
We all have dreamed of having a garden of our own. Right? But when it comes to the labor of planting the seed, then water it for months and then waiting for fruits or flowers to come. It is a tedious and time taking process.
Today we are going to learn about the 5-Gallon bucket hydroponic system, which will basically help you reduce your efforts and help you grow organic and fresh vegetables in your backyard.
So without further ado, let’s jump right into it. Feel free to directly skip to the steps by using the section links below.
Disclosure: Some of the links below are affiliate links, meaning at no extra cost to you, I will earn a commission if you click through and make a purchase.
What is a bucket hydroponic system?
As the name suggests, the bucket hydroponic system is basically a self-watering gardening setup where we use a bucket full of nutrients covered with some grow media and the plant. The bucket hydroponic system is also called the 5 Gallon Bucket System as it generally uses a 5-gallon bucket to hold the plant and the nutrients.
The mechanics of the system work on the principle of deep water culture i.e. when the roots of a plant become long enough they are able to feed themselves from the nutrient solution that we have made available inside the bucket.

Other types of deep water culture systems include raft hydroponic systems that are mostly used by commercial hydro growers and the Kratky method of hydroponics, which is basically the same as a bucket hydroponic system. It is mostly used to grow smaller plants like basil, lettuce, microgreens, etc.
If you want to learn the Kratky method of hydroponics, then click here.
Advantages of Bucket Hydroponic System
- Easy to build and maintain
- Low-cost hydroponic system
- Best for growing plants that need more space
- The system takes less space
Disadvantages
- Requires a lot of nutrients to fill the bucket
- Need more space when the plant gets bigger
- As plants grow around the year in a bucket system, maintenance can be difficult
- An air pump is required 24×7 once the root grows big
What is the difference between the bucket hydroponic system and Dutch Bucket System?
Please don’t confuse the bucket hydroponic system with the Dutch Bucket System of hydroponics. Although both look similar there is a fundamental difference in the way the nutrients are supplied in the Dutch Bucket System.
The Dutch Bucket System is more like an NFT system where a small amount of nutrient solution is being pumped in at regular intervals with the help of spray tubes that are connected to a pump and an external nutrient reservoir.
Which plants can I grow in a bucket hydroponics setup?
As we normally use a 5-gallon bucket for this hydroponic setup, there is a lot of room for the roots to grow. Hence plants that require large space to grow are generally preferred for this system.
A few of our favoured plants to grow in the bucket hydroponic system are tomatoes, watermelons, pumpkins, figs, cucumbers, etc.
A tomato plant can take up to 45-60 days before it starts giving some yield and in that time it can potentially grow anywhere between 15 to 25 inches in vertical height.
Suggested Read “21 Best Hydroponic Gardening Gifts for Holiday season“
Supplies required for Bucket Hydroponics
One-Click Amazon Shopping List – Bucket Hydroponic Supplies
This list has all the components listed below as well as a few of the DIY bucket hydroponic system kits which can reduce your effort in building the system. If you are a beginner, I would highly recommend going with a kit. It will be super easy and fun.
| S No. | Item Name | Price on Amazon |
| 1. | A 5 Gallon Bucket 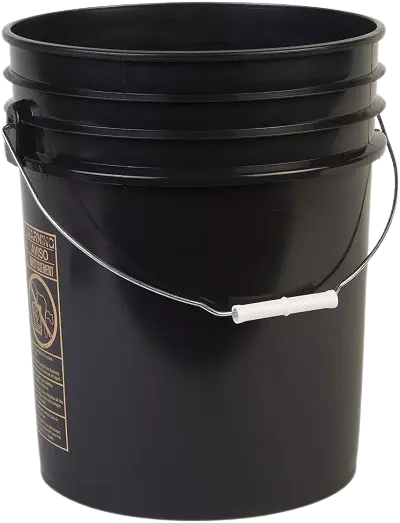 | Check Price |
| 2. | Net Pot Bucket Lid 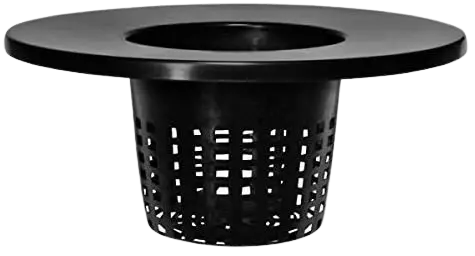 | Check Price |
| 3. | Hydroton Clay Pebbles 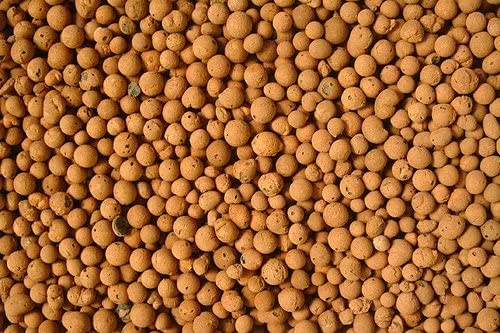 | Check Price |
| 4. | Nutrients 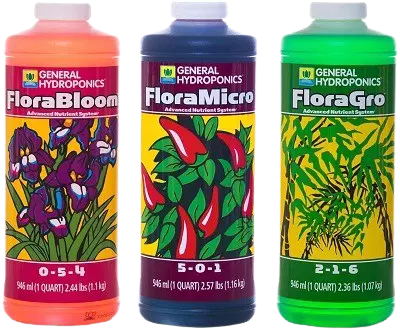 | Check Price |
| 5. | High-Quality Seeds | Check Price |
| 6. | Air Pump 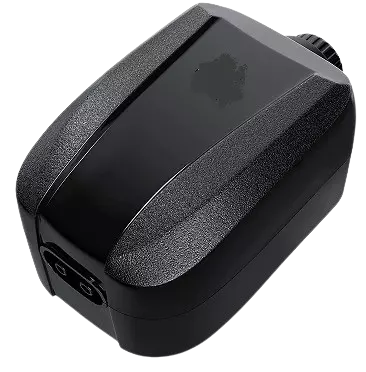 | Check Price |
| 7. | 5-inch Air Stone 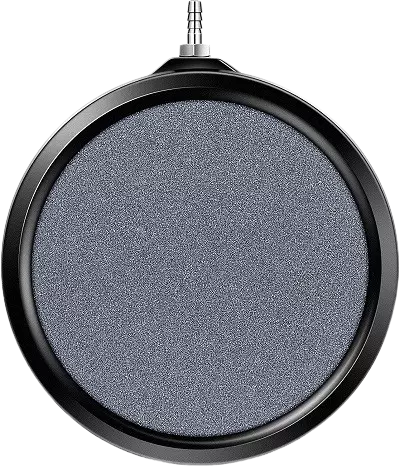 | Check Price |
| 8. | Transparent Tubing 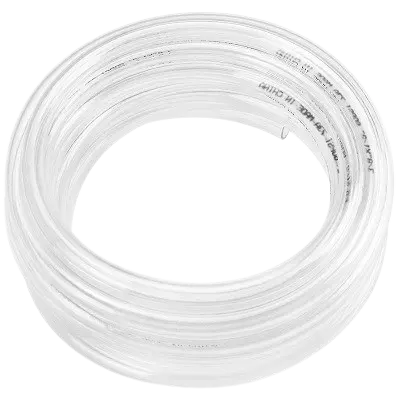 | Check Price |
| 9. | Rubber Grommet 3/4′ I.D. 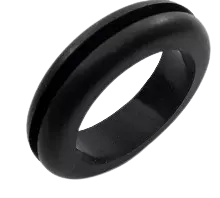 | Check Price |
| 10. | Barbed Elbow 1/2′ O.D 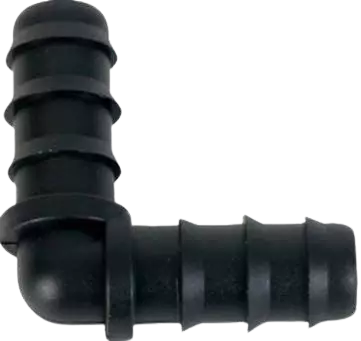 | Check Price |
A Black 5-gallon bucket
The bucket is the most important part. You have to get a quality 5-Gallon bucket preferably of black color. The black color makes sure that the sunlight is blocked to reach the nutrient solution, because if it does, the bottom of your bucket may start producing algae which are not so good for plants in the long term.
Net Pot Bucket Lid or a pot to cover the bucket
Either you can get a net pot bucket lid as shown below or make your own lid by getting a pot that is almost the same size as your bucket and then cut holes in the bottom.
Generally, buckets for the hydroponic system come with a net pot lid as well. So, nothing to worry about.
Grow Media – Hydroton Clay Pebbles
Hydroton clay pebbles will be used as grow media. Grow media is basically the medium between your plant roots and the liquid nutrient. It helps to give support to the plant roots and also keep the roots oxygenated.
Hydroton clay pebbles are preferred because they are quite porous and have a great absorbing capacity which makes a good wicking system for hydroponics. Also, they are cheap and can sustain for longer periods of time as they do not drain out with the nutrients from the hole in the pot.
You can use the same clay pebbles for more than 2-3 years if they are not infected by algae or root rot.
Also, Read “13 Best Grow Media Types for Your Hydroponic Setup“
Nutrients – Flora Series GH
If you are planting tomatoes or anything like it then Flora Series from General Hydroponics is a good option for nutrients. The kit contains three types of nutrient solutions, Flora Gro (2-1-6), Flora Micro (5-0-1), and Flora Bloom (0-5-4). The number in the bracket represents the NPK (Nitrogen, Phosphorous, Potassium) value of the nutrients.
Also, Cal-Mag from Boatnicare is a good supplement for tomato plants. It contains Calcium, Magnesium, and Iron.
Air Pump
An air pump is important for the bucket hydroponic system because it will keep the nutrient solution aerated which in turn will help the absorption of more nutrients by the roots.
A good quality Air Pump is required for this system as when the plant gets bigger the bottom of the bucket gets completely filled with roots. A good quality air pump will help maintain the aeration inside the bucket no matter the amount of root bulk inside.
Air Stone
Again, the air stone will be the one that will be producing those air bubbles. Hence, you need a solid air stone that can handle at least 3-4 gallons of nutrients and bulk of root mesh.
It is recommended to go with 5 – 8 inch air stone. It will really help you in the long run, if you are planning to grow tomato vines or cucumber vines in your bucket hydroponics system.
Air Hose
A 1/2 inch I.D (inner diameter) transparent or semi-transparent water hose is required to connect the bucket with the nutrient inlet and outlet and also to connect the Airstone with the air pump.
Also, Read “How to grow Hydroponic Lettuce at Home“
Rubber grommet – 3/4 inch I.D (Inner Diameter)
We will use this to seal off the hole which we will use as the outlet and will also help in measuring the amount of nutrient solution left inside your bucket.
Barbed Elbow piece – 1/2 inch O.D (Outer Diameter)
This will go inside the rubber grommet. Elbow shape will help in using the same hole for measuring the levels and as an outlet as well.
Make sure the diameter of both the pieces are in sync otherwise it will not work and there can be leakages.
Grow Light (if required)
If your hydroponic system is placed completely indoors then grow light will be required and if not then a grow light may be excused.
In case you require a grow light, check out our list of top-10 grow lights of 2021.
Cost of Bucket Hydroponic System
The cost of the bucket system depends on the quality of the material you are using and also on the number of buckets you are using.
If you get a DIY kit straight from Amazon then it would cost you around $50 – $70 to start growing your plants. I am including the cost of seeds and nutrients along with the cost to build the system.
Most of the parts are pretty cheap and can be found in your garage as well. The real cost is of the air pump, nutrients, air stone, and grow media. Most of the parts come in multiples or in large quantities hence can be used for multiple seasons and growing various plants.
In the short run, the bucket hydroponic system is not a cost-saver but in the longer run, when you keep using the same bucket system to grow tomatoes, etc. again and again, it does pay off well.
Checkout “AeroGarden – The Best Indoor Hydroponic Garden“
Steps to Build Bucket Hydroponic System
Preparing the Bucket
- So in this step, we are going to put a hole in the bucket that will act as the outlet and nutrient level indicator.
- You need to drill a 3 /4′ inches hole on the side bottom of the bucket. This hole should be at least 1 inch above the bottom of the bucket.
- Smoothen up any burrs or extra plastic around the hole with sandpaper, if needed.
- Once done, you need to fit the rubber grommet in the hole. Gently push the grommet until its rings are clearly visible on both sides of the hole.
- At this point, the grommet might seem a little loose. Don’t worry, it will become watertight in the next step.
- Now, take the barbed elbow and gently push it inside the grommet hole. Don’t push too hard or you may dislocate the grommet itself.
- You now want to test the grommet elbow for any leakages. Just pour in some water and check if there is any.
- In case there is you can use any aquarium grade silicone seal to fix the gap. A household sealant may not be the best choice as it contains harmful chemicals for the plants.
Preparing Drain Outlet
- Once the silicone seal dries off, you can slip the 1/2′ inch OD transparent tubing on the outside of the barbed elbow. Keep the length of this pipe to about 4 to 5 inches and tape it up on the side of the bucket.
This tubing helps in two ways
- It acts as a nutrient level indicator. It will show you the exact level of the nutrient left. This we will discuss in the further steps.
- It acts as a drain pipe. So, to maintain a plant for long you need to sometimes flush all the nutrients and for that this tubing will help you get it all out by rotating the barbed elbow downwards.
Placing the Net Pot
- Now if you got a net pot lid as shown in the image below, you can easily skip to the next step.

- If you have to DIY the net pot. Take any plastic pot that can hold at least 1 litre of Hydroton clay pebbles and just fits the top of your bucket.
- Drill some holes in the pot as if it were a net cup. Make sure that the holes are not so big that the growing medium can pass through them.
Preparing Nutrient Level Indicator
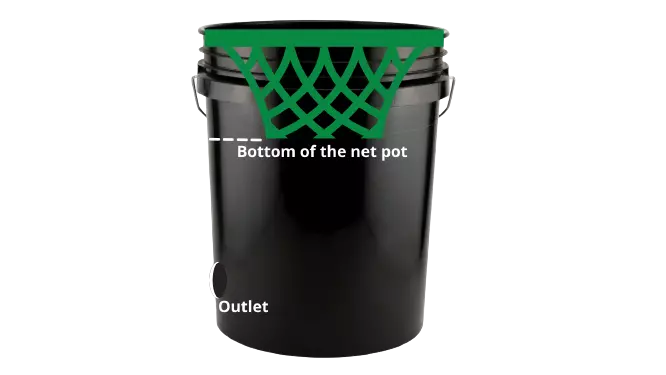
- You need to cut a V-shaped hole in the pot lid to create an opening for the air pump tubing. Now place the net pot lid on the bucket just as you would do once the system is complete.
- Mark the point on the bucket where you can see the bottom of the net pot inside the bucket as shown in the illustration below.
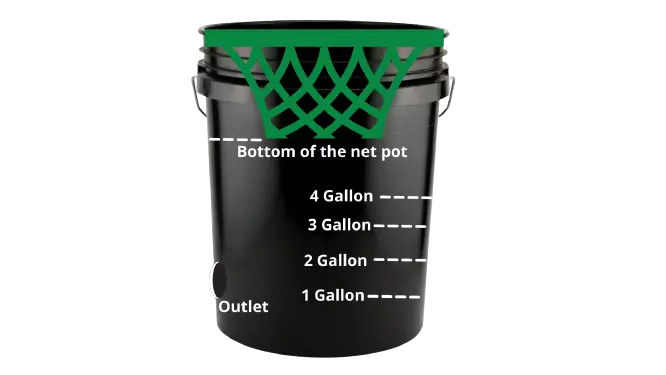
- Now start adding water. Add 1-gallon water at a time and then mark the spot on the bucket and the tubing.
- Repeat the above step till you reach the bottom of your net pot lid. By doing this you have created a measurement to know the exact amount of the nutrient solution left in your bucket.
Installing Air Pump & Air Stone
- Now connect the air stone and the air pump with a 1/2 inch outer diameter tubing. Test the air pump and it bubbles up the whole bucket full of water that you just added.
Why is Air Pump required?
Aeration is as important as the nutrient solution itself. Aeration means adding and maintaining adequate levels of oxygen in the water. This helps the roots of your plants to absorb more nutrients uniformly. It keeps your roots oxygenated.
Also when your nutrient solution is just kept in a closed bucket and the root mass is growing at a rapid pace, the stagnated solution starts to develop bacteria and anaerobes. This can also cause the problem of algae.
In case you are facing the problem of algae or your roots are getting browny and greasy, it is the problem of root rot. Check out our guide to fixing root rot at home.
Adding Nutrient solution
Just to summarize, we have already set up the bucket with an inlet and outlet, marked the measurement on the bucket, and installed the air pump as well.
- Now it’s time to add the nutrients. As we have already added 3 gallons of water in the bucket. We can add our nutrients directly to that water.
- I am using the Flora Series which is a 3-part nutrient solution. If you are using the same, then follow the steps given below or else follow the instruction given with your bottle of nutrients.
- For Flora Series, we have 3 types, Gro, Micro, and Bloom. The instruction is very simple, you have to add 3 tablespoons of each type in 3 gallons of water that you have already filled.
The rule is 1 tablespoon of nutrients for 1 gallon of water.
1 Tablespoon = 5 mL
1 Gallon = 3.79 L
You can also get the complete feed chart for the Flora series here.
Also, read “Top 5 EC Meter for Hydroponics“
Start Growing
After all, this is done, it’s finally time to get going.
- Fill the net pot with rinsed Hydroton clay pebbles until it’s full. Make some space in the middle and place your seed or plant bud in it. Support it with grow medium.
- Pour around 250 mL or 0.06 gallons of nutrient solution around the plant and the grow cube in which the seed of your plant is.
- You need to keep watering your plant with nutrients every day at least once. After a week and a half check if the plant roots have grown enough to reach the nutrient solution inside the bucket.
- If the roots have popped out and grown strong, you should remove some liquid from the bucket so as to keep an air gap between the bottom of the net pot and the top of the nutrient solution. This allows the roots to breathe and be healthy.
How to start the hydroponic plant in the bucket system?
If you don’t know how to start a seed to plant in the hydroponic system then you should go check this article.
Maintaining the nutrient level in bucket hydroponic system
So, now once your plant is absorbing nutrients from the bucket, you will notice that the nutrient level keeps going down.
When the plant is in the growth stage the nutrients are absorbed faster. So, you need to keep topping up the nutrient solution with more water. Yes, I said water.
You have to add water until you have added around 5 Litres or 1.5 gallons of water to your initial solution mix.
Do not add more nutrients. It will cause a change in the pH and nutrient levels or NPK (Nitrogen-Phosphorous-Potassium) concentration in the solution. To check the pH and EC of the nutrient solution you should have a pH or an EC meter.
Suggested Read “pH management guide for Hydroponics“
When to change the nutrients in a bucket system?
We change the nutrient solution in a bucket system in batches. That is the reason I told you not to keep adding more nutrients to the initial mix.
After you have added about 1.5 gallons of water. Let the plant consume it until it reaches the 1-gallon mark. That’s when we will flush out the nutrient and add a fresh batch.
To flush out the nutrient, you just have to rotate the tubing downloads and everything will automatically come out. Re-instate the tubing into its original position once done.
This time we need to add 2 gallons of water and add 2 tablespoons of each of the Gro, Micro, and Bloom nutrients.
To add the nutrient solution, gently raise the net pot from one side and pour in the nutrient. Or you can also use a funnel.
Is Grow Light required for bucket hydroponic system?
Grow light is generally not needed as the plants you are growing are going to get so tall and long that they will be needing natural sunlight. But if you live at a place where natural sunlight is not easily available then you should look at getting one.
Some of the options that you can check are Mars Hydro TSW 2000 or the VIVOSUN VS 2000 LED grow light. These can easily cover large plants like tomatoes or cucumbers and provide full-spectrum light for perfect growth.
Also, Read “Top-10 LED Grow Lights for Hydroponic gardening“
What a wonderful idea! I’m glad I read this blog!
Happy to help! Thank you!
What’s Happening i’m new to this, I stumbled upon this I have found It absolutely useful and it has aided me out loads. I hope to contribute & help other users like its aided me. Great job.
Glad you found it helpful. If you wish to share you experience on this blog, do get in touch through the contact section.
I like the valuable information you provide in your articles. I will bookmark your blog and check again here frequently. I am quite certain I will learn lots of new stuff right here! Best of luck for the next!
Hi there it’s me, I am also visiting this website regularly,
this website is really pleasant and the visitors are in fact
sharing pleasant thoughts.
I do not even know how I ended up here, but I thought this post was good.
I don’t know who you are but definitely you’re going to a famous blogger if
you aren’t already 😉 Cheers!
Heya i’m for the first time here. I came across this board and I
find It truly useful & it helped me out much. I hope to give something back and aid others like you helped me.
My brother suggested I may like this blog. He used
to be totally right. This post truly made my day. You can not believe just how much time I had
spent for this info! Thank you!
Very good post! We are linking to this particularly great article on our
website. Keep up the good writing.