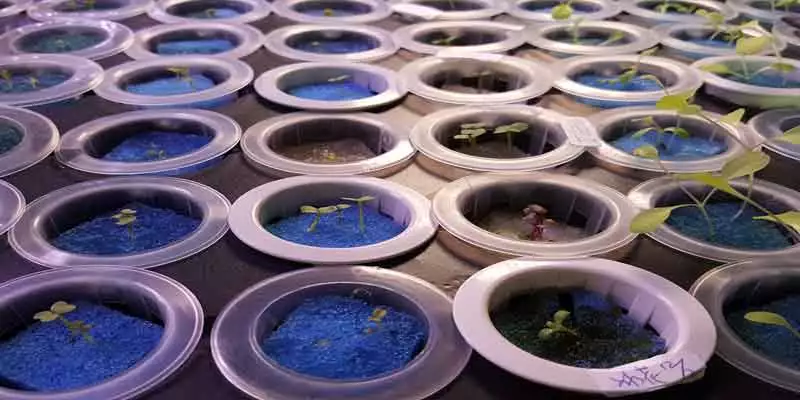
Today we are going to learn how to start seeds in a hydroponic environment. Now there’s a couple of different reasons you’d want to do this. Number one, it’s fun and something, once you learn, will help you for the rest of your lives. Number two, you get a little bit of a benefit in terms of starting your own hydroponic garden because we’re going to be using an air pump and an air stone which will help our hydroponic seeds germinate faster and better.
We will put the hydroponic seeds in moisture the entire time that they’re sprouting and then once the roots start to push downward searching for water and searching for nutrients, we’re going to have little bubbles created by our air pump and air stone combo at the surface of our reservoir. This is the best way to germinate hydroponic seeds and will help to keep them moisturized and really stimulate that root growth.
For getting started you might want to have some home hydroponics supplies or a seed germination kit. If you already haven’t, don’t worry I will give you an idea as to what all you will be needing to do this. In brief, these are the things that a hydroponic seed starter kit will have or you can buy them from the open market as well.
1. Hydroponic Equipment Required
- A container with a lid and grow pots (or holes on it to put grow pots)
- A grow media Rockwool, coconut coir, perlite, peat moss, etc
- Seeds ( we will be using spinach seeds here)
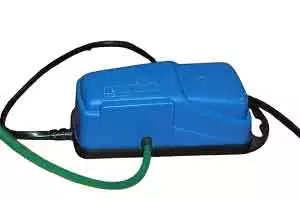
- An air pump and an air stone
- Some extra tubing
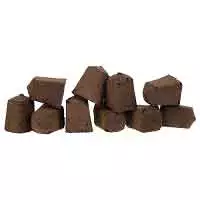
- Hydroponic seed starter plugs ( in case grow media is not available)
So here is a list of things that you will be requiring for sure. It will be best to go to a hydroponic store near you to find all these items. If you are not able to find them near you then you can find them easily on amazon or home depot.
It would cost around $30 – $50 in general for a hydroponic seed germination kit. If you are worried about the cost of an air pump then don’t worry it will not cost more than $20. You can get a Petco air pump for $10 only and they also provide you with some tubing.
So that’s all we need.
2. Fill the Reservoir
Our next step is very simple. Just fill up your reservoir with water. And the idea is you want to have the net pots just barely above the surface of the water. So when we put the grow pot on the lid hole and close the container the bottom of the grow pot should be just touching with the bottom of the grow pot.
And what that’s gonna allow us to do is have the air stones bubbling and hitting the rapid rooters, which are right above the bubbles, hitting the bottom of the grow pots with water and the roots of the hydroponic seeds will be pulling that moisture up into the root system and stimulating growth a little bit further.
Note: While you are filling your reservoir with water. Make sure the reservoir or container is clean and it is advisable to check the pH level of the water that you are filling. It is good to have an idea of the pH before starting the seed germination so that we can control it later on. If you are mixing some nutrient into it the pH level should be between 5-6.5 and if it’s only water then nearby 7 will work.
Also Read “8 Steps To Master Hydroponic Nutrient Solution“
3. Connect Air Pump
So the next step is going to be connecting air stone and air pump together and setting that up in the system.
All you have to do is connect the tubing to the air pump and connect it on the other side i.e an airstone to that air pump. There are many shapes and sizes available for an air stone depending on the type of system you have and the volume of water your container can hold.
The disc-shaped ones are probably going to be better suited, and there’s also bar-shaped ones. I found that the disc-shaped ones last a decent amount of time. The bar-shaped ones kind of float around and they’re hard to deal with. So, a recommendation from my side would be to get a disc-shaped air stone.
You can control the air pressure from the air pump and make sure that you are giving enough air into the air stone that the complete surface of the water is bubbling up otherwise some seed will germinate better than other. It will happen because there will be non-uniform moisture availability.
4. Filling up Grow Medium
Moving ahead with further steps. You want to take your cover, plop it on top, and start filling it with rapid rooters. You have to make sure that you cover the grow pot with enough grow medium, at least till the top. We are using rapid rooters here, you can get starter plugs or any grow media that you are comfortable with.
All we have to do now is make sure that we moisten these up a little bit. The grow media could be a little dry when you first get it from the store so you should sprinkle some water over it otherwise it will dry up your hydroponic seeds very fast. This will help them hydrate and also bind and mix well.
While you are using a specific grow media like a starter plug which contains all the ingredients to start a hydroponic seed but what if you don’t have starter plugs? You can add some nitrogen to your reservoir if you think your grow media is neutral. Research has shown that nitrogen has a positive effect on the germination of hydroponic seeds.
5. Planting the Hydroponic Seeds
So now I’m going to go ahead and soak these and then we’re going to go ahead and get to the planting, which is the very final step. All right? Let’s get these fully cooked and ready for planting. So I’m going to plant some spinach seeds.
All right, so when we plant these, we want to make sure that we’re not just planting one per pod. And the reason being is because not every seed has a hundred per cent germination rate. So if we plant two or three seeds, we can always thin it out later by cutting off or rooting out the plant which is not actually growing.
With this technique, we’re going to pretty much guarantee that we have something sprout from every single one of our net pots. Just go ahead and drop them in, give them a little shake, make sure that they’re in there nice and good. Once you are done with the seeds, cover the pots with some more media. This way the seeds will be well locked.
6. Transplanting the Seeds
But as now you will be thinking, they’re hiding down in there right now, how will I make sure that they’re moist enough? Making sure that they’re moist isn’t going to be a key thing for some days. So fill up every single one of these with some seeds and then just kind of let this thing sit.
For the most part, you don’t have to worry about anything. The only thing you really have to take care of is that the water level doesn’t go down. So keep an eye on that.
But it really shouldn’t because this is probably going to be indoors. And then, you know, watch for your seeds, watch for them to come out. When you see them start to come out and they have their seed leaves, which is called a cotyledon, make sure that you thin them out.
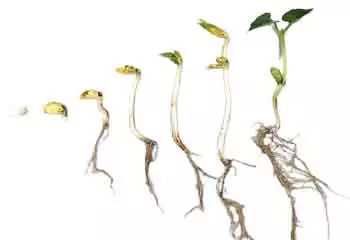
Pick the best looking one in each one of these little pods and cut the rest of them away. Then you can take a look under the system and see if the roots are starting to pop out.
That’s when you know that your hydroponic seeds are going to be really thriving and pretty much ready to be transplanted into maybe a bigger hydroponic system, out into your garden or into really whatever setup that you want to do.