What is Mason Jar Hydroponics?
Growing Mason jar Hydroponics has been a raging trend, and it’s not difficult to know why.
To begin with, it is simple and less complicated to grow. It also allows indoor growers like you to add a beautiful hydroponic garden to your kitchen or balcony. Remember, it looks fantastic in your house and blends with any interior decor.
Hydroponics in a mason jar can also be a good choice for beginners interested in indoor gardening. Since it does not need soil, hydroponics is easy to grow and manage. However, hydroponics in a mason jar can be tricky if you don’t know the correct components and steps.
So, let me present the most simple DIY steps to start with Hydroponics in Mason jars. Let’s dive right in!
Advantages of Hydroponics in Mason Jars
- Reuse of sauce and pickle jars
- Perfect for indoors as it takes significantly less space as compared to the traditional way
- Lesser risk of damage to the plant/fruit due to no soil
- Fresh vegetables/fruits/herbs around the year
- You can plant multiple types of plants inside one jar itself.
Disadvantages
- It can be tricky to start the plant if the seeds do not start properly.
- Plants can die quickly if the nutrient composition gets imbalanced.
- Water in the mason jars can get deoxygenated easily if not changed at regular intervals.
- A transparent mason jar can promote algae growth inside the jar.
Requirements for DIY mason jar hydroponics
Let’s look at the supplies you need to have for growing plants in a Mason jar hydroponically.
Ingredients:
| S No. | Item Name | Price on Amazon |
| 1. | 64 Oz Mason Jars  | Check Price |
| 2. | 3-inch Net cups (As per width of the mouth of your Mason Jar) | Check Price |
| 3. | Rockwool Cubes 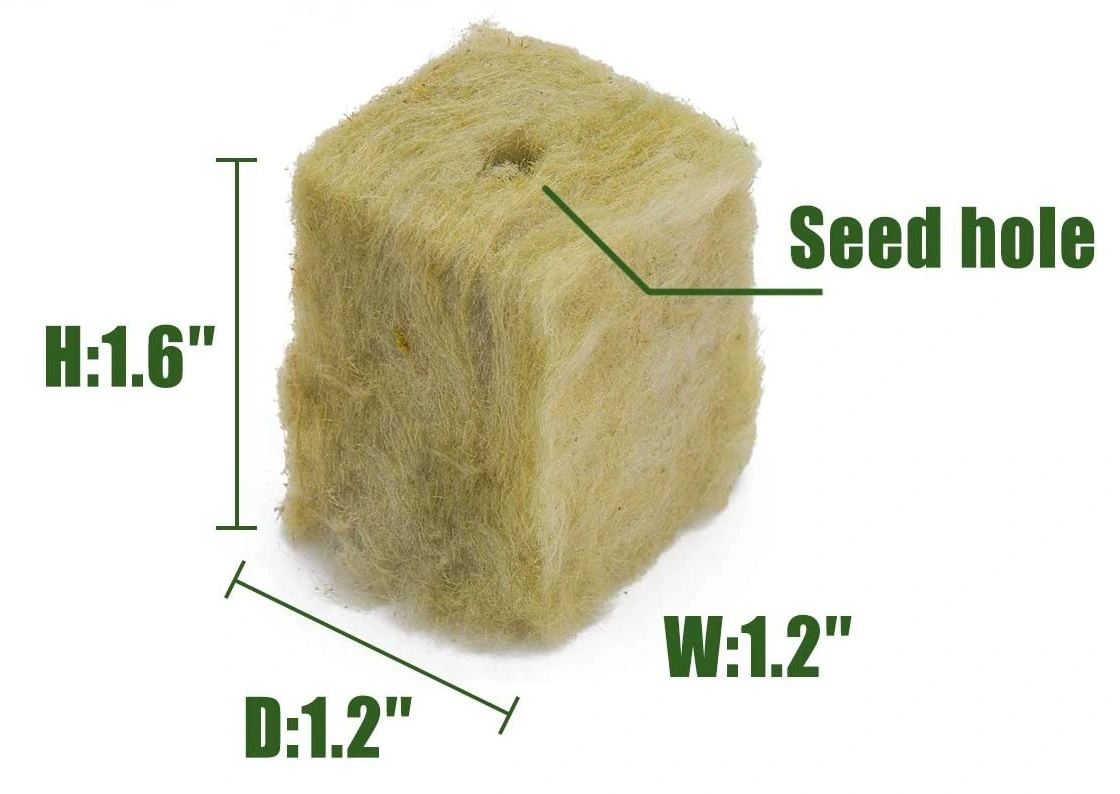 | Check Price |
| 4. | Nutrients 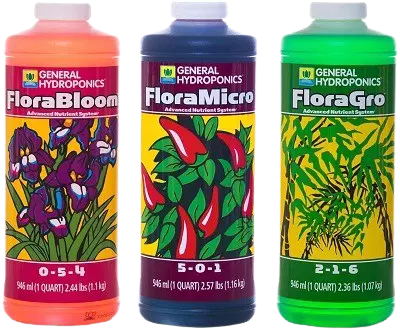 | Check Price |
| 5. | Heirloom High-Quality Seeds | Check Price |
| 6. | Chalkboard paint | Check Price |
| 7. | Black Acrylic Paint | Check Price |
| 8. | Black sleeve for Jar | Check Price |
| 9. | LED Grow Light (if required) | Check Price |
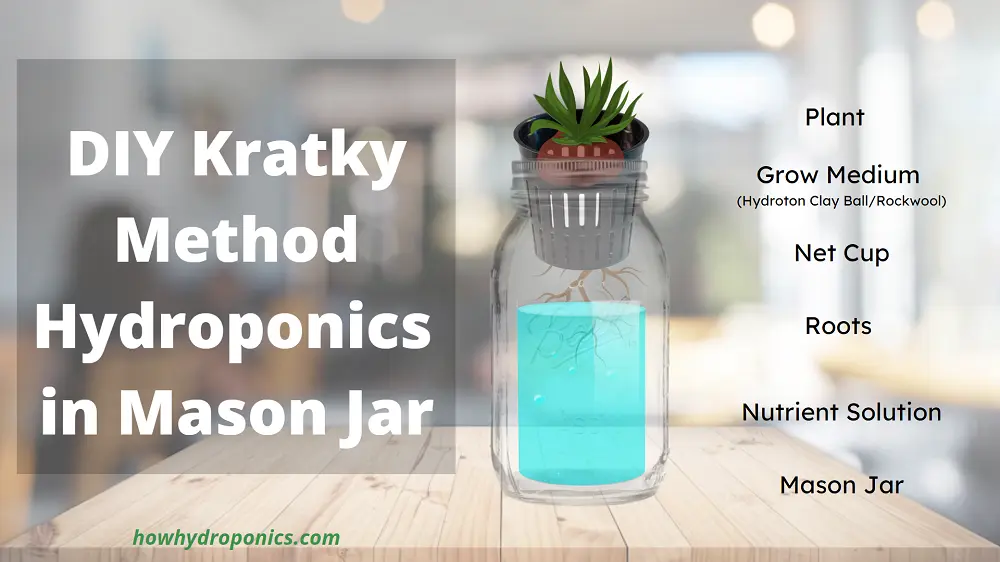
Kratky Method for Mason Jar Hydroponics:
Whenever you see a Hydroponic without a water stone or pump, you should know that Kratky Method has been used. This method is straightforward and convenient for indoor Hydroponic gardening. And you must use this method for your beautiful Hydroponic mason jar.
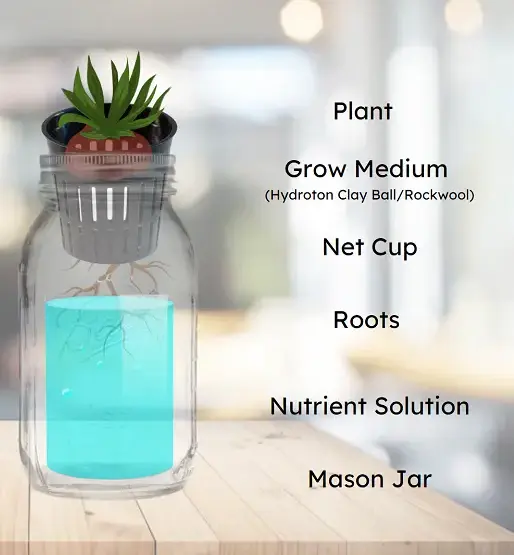
You must be wondering now what Kratky is Method exactly. To put it in simple words, it is a passive Hydroponic technique as shown in the diagram above.
To use this method, you must begin by suspending the plants on a net cup placed above a reservoir of nutrient water. Please be careful that water should touch only the tip of the roots. Any leafy green fast-growing plant like lettuce is exceptionally compatible with the Kratky Method.
After arranging all the necessary supplies, let’s proceed with the steps. I have compiled a simple 9-step guide for you.
Also Read “How to Grow Kratky Tomatoes Easily“
Step 1. Germinating the Seedlings
The first step starts by germinating the seeds you bought. If they are not seedlings, they cannot access water. To germinate your seeds, you can go with the Rockwool cubes. It works excellently as a growing medium. First, place your seeds on a plate and use a toothpick to place individual seeds on the Rockwool cubes. Then moisten the seeds using a spray bottle and wait for some days. Leafy greens generally take four to ten days to sprout.
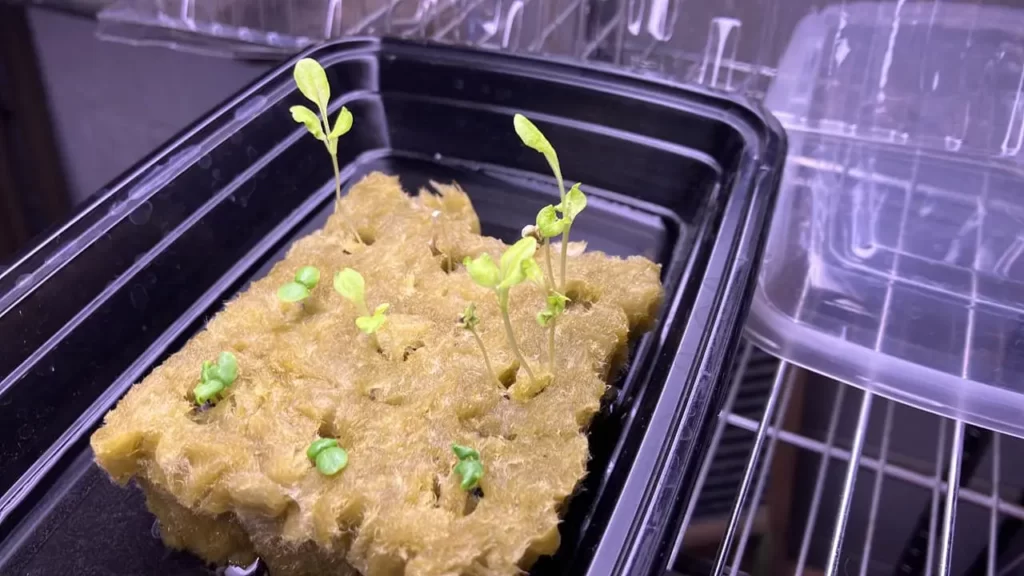
Please note for using rockwool; you need to soak rockwool in water for at least 24 hours so that the pH of Rockwool is around 5.5. You can also use hydroton clay balls after soaking them in water for 24 hours.
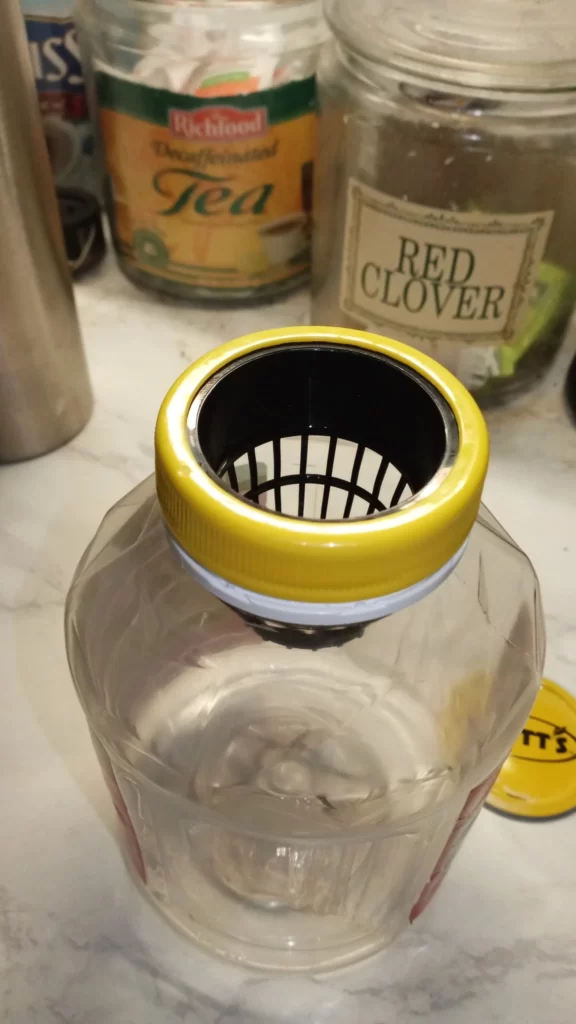
Step 2. Select the Mason Jar
Selecting the Mason jar is an important task you want to complete beforehand. Using a jar with a wide mouth is advisable. For creating a Hydroponic garden, sizes between 32 and 64 oz are more convenient. But remember to choose a large-mouth one. Below are some examples of what people generally use for hydroponics in mason jars.
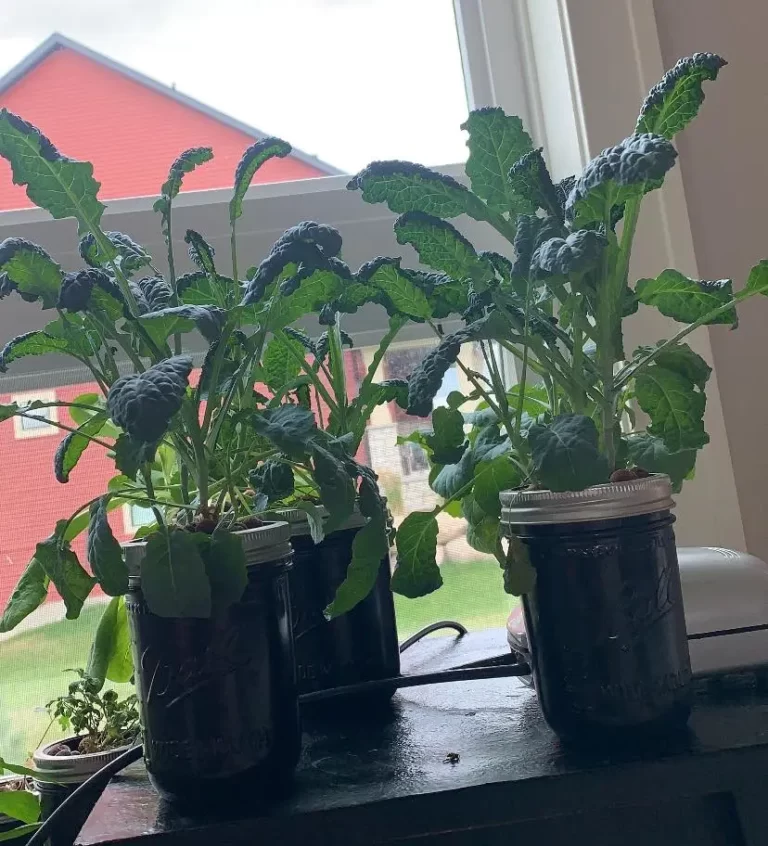
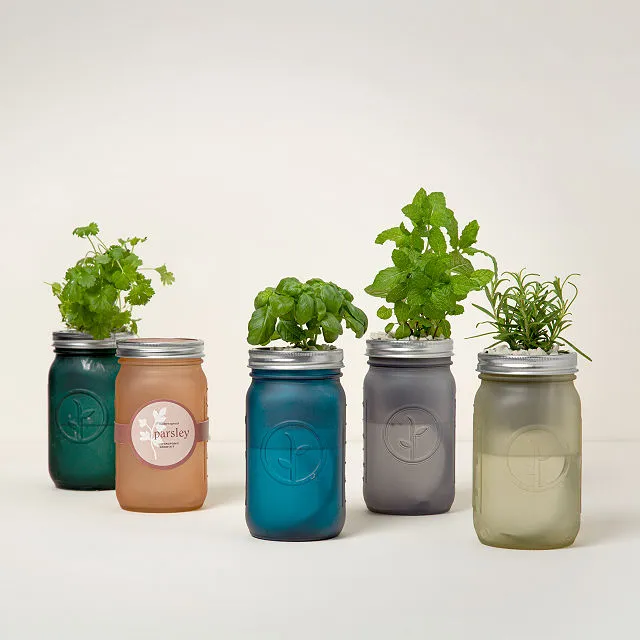
There are several benefits of using a wide-mouth jar for Hydroponic. First of all, you will not have trouble cleaning them. Then you can easily replace the jar when needed without hurting the plant. Make sure to choose a mason jar that matches the net cup’s size.
Step 3. Cover The Jars
It is a small step that prepares for step 4. In this step, you need to undo the lid and the top of the jar. Then place plastic wrap or plastic baggies between the jar and the lid. This entire step is to safeguard the insides of the jar from the paint you will use in the next step.
Check out “DIY 5 Gallon Bucket Hydroponic System under $100“
Step 4. Painting the Jar
As your plants need access to nutrient-rich water, the jars you use must be painted black or covered correctly. It will ensure no light comes in and messes with the nutrient water you will be putting in.
So use jet black acrylic paint and thoroughly paint the Mason jar’s outside. You can also use chalkboard paint in this step.
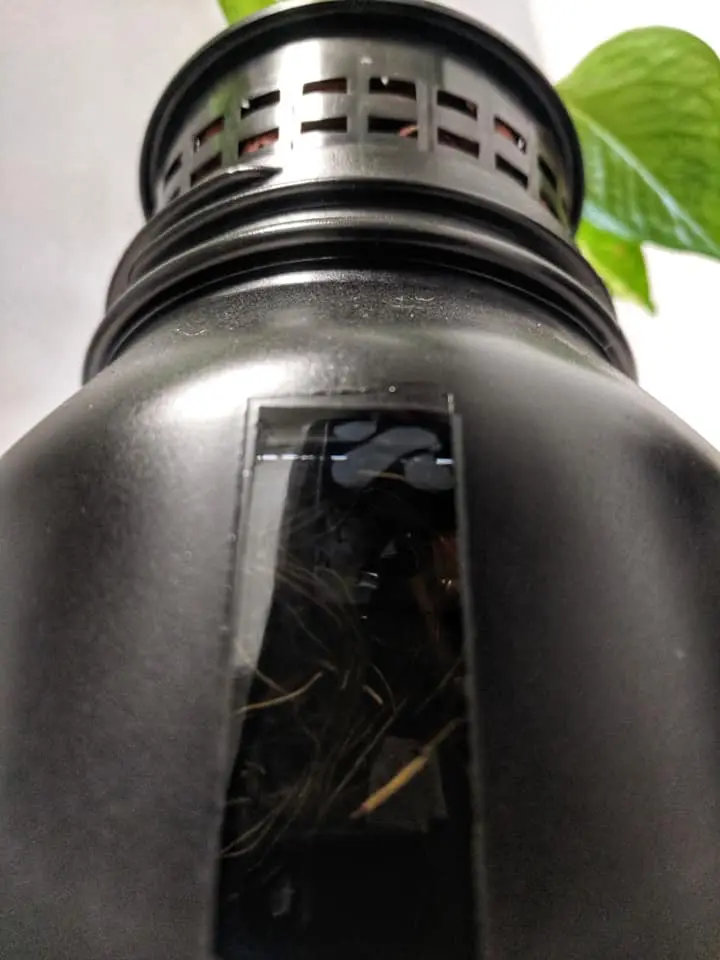
You can also add a strip of black tape that can be removed later once the paint is dried. This will help you take note of the nutrient levels inside the jar as shown below.
Step 5. Adding Water
Add water to your mason jar but make sure to leave a 4.30″ gap from the mouth of the jar. This little gap bears high significance. The net cup is usually 4″ deep. And that gap would work as the slightest air gap between the water and the net pot.
This gap allows the tip of the plant’s root to touch the water surface. Now you can adjust the water line according to the size of the plant’s root.
You must keep tracking the amount of water you use because that determines the number of liquid nutrients you add.
Step 6. Adding Nutrient Solution
The main requirement of Hydroponics is to add the proper nutrients the plant needs in the growing medium. In this case, the growing medium is water, so you must add liquid nutrients.
All the ready-made nutrient solutions available in the market come with detailed instructions. Make sure to follow it correctly.
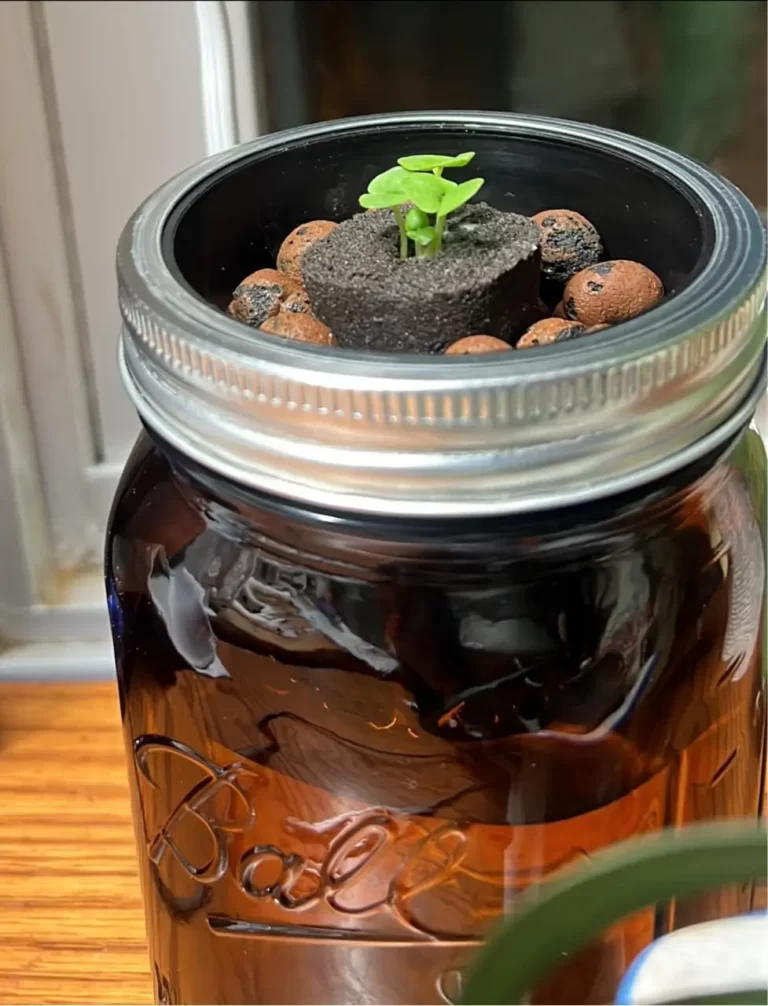
Step 7. Placing the Net Pot
Now, it’s time to place the net pot into the jar holding the plant.
Step 8. Adding the Plants With Growing Medium
The growing medium holds the roots of the plants. Rockwool, peat moss or hydroton clay balls work fine in a mason jar. Rockwool is the most convenient option for beginners. Otherwise, you can use clay pebbles for a classy look also.
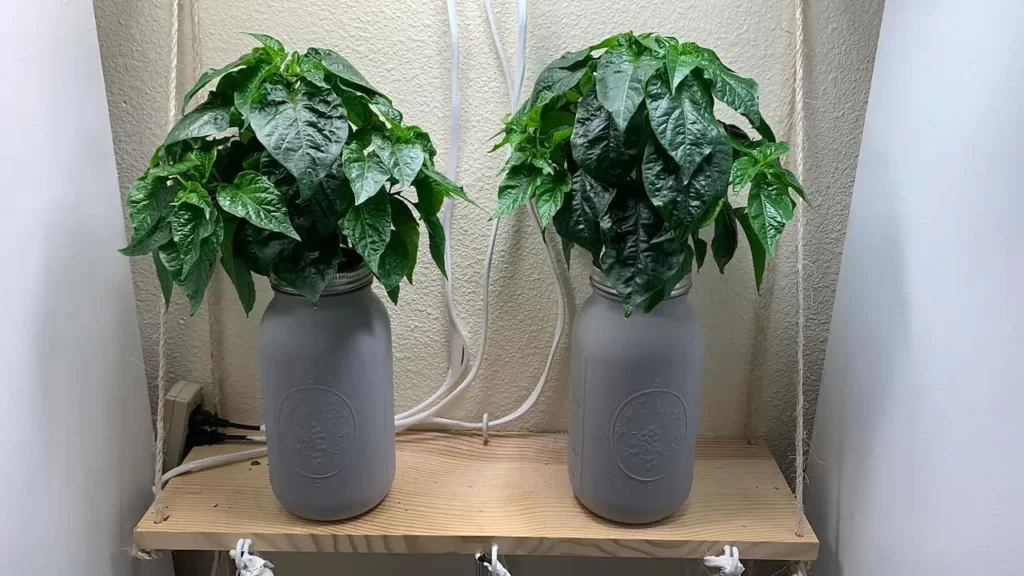
Step 9. Placing the New Hydroponic Mason Jar Properly
Place your newly made Hydroponic mason jar in the area where the daylight comes in. Your little plant needs to stay under light to grow profoundly. If artificial lighting is unavoidable, you should go for LED grow lights.
Check out our guide for Best Indoor Grow lights for hydroponics.
Keep them on for at least 14-16 hours, as leafy greens mostly need. Make sure to track the root growth and provide proper care to your little friend!
Final Take
Growing a plant means extending a life. It is no less than taking care of your pet. It requires much attention and cares from you.
And it would be best if you were entirely committed to growing a Hydroponic mason jar. Make sure to follow the steps correctly; otherwise, it can go severely wrong.
FAQ
What can I grow in a Mason jar with Hydroponics?
With the help of hydroponic techniques, anything can be grown. But due to the limitations of a mason jar, it is advisable to grow leafy greens like lettuce, basil, kale, spinach, arugula, collard, mints, chives, thyme, sage etc., or if you are experienced, then you can also try tomatoes with mason jars.
What is Kratky Jar hydroponics?
Kratky Jar hydroponics is a technique for growing plants in a mason jar or any glass or plastic bottle without soil. This technique requires using the nutrient solution, growing medium like rockwool, and net cups. With the help of the Kratky method, plants can be grown indoors, i.e., in the kitchen or balcony.
Can I use a glass jar for hydroponics?
Yes, you can use a glass jar for hydroponics. Generally, people use leftover mason jars for growing hydroponics. One thing to keep in mind is that the mouth of the jar should be wide enough to place a net cup inside it. A net cup is a thing that holds the growing medium, and the plant and the roots are suspended from the net cup and touch the nutrient solution.
Can I grow lettuce in mason jars?
Lettuce can be grown in a mason jar using the Kratky hydroponics method. Leafy and green vegetables are relatively easy to grow in mason jars as they don’t require much attention, and once the seeds are germinated, they start to grow very fast. You need to keep pruning the lettuce. Otherwise, the plant will soon outgrow the mason jar, and the growth will stall.
Can I grow tomatoes in mason jars inside my kitchen?
Yes, tomatoes can be grown in a mason jar. But growing tomatoes requires light; hence, if you want to grow tomatoes inside the kitchen, you will require LED grow light or natural sunlight for at least 12-14 hours a day. Also, the size of the mason jar that you take needs to be larger than what people typically use for leafy greens, as the height of the tomato plant can be bigger.
Can I grow strawberries in a mason jar hydroponically?
Yes, strawberries can be grown in a mason jar, but it will be a little tricky. As the plant grows in height and width, you will need to place supports and train the plant to grow in a particular direction. Also, due to the smaller size of a mason jar, you will need to refill the nutrient solution frequently.
Do I have to change the water in the Kraty method?
Yes, you need to change the water and nutrient solution used after a month or so in the Kratky method. You don’t want to use a nutrient solution whose pH levels are not maintained. Because if the pH levels of the nutrient solution get imbalanced, the plant’s growth stops and leaves start to become yellow or white in some cases.
Can I grow hydroponics without nutrients?
While people on the internet say that hydroponics can be grown in water only, that is not true. As the plant is not planted in the soil, so it is deprived of natural nutrients. Hence we need to supply nutrients in the form of water (mixed with nutrients like nitrogen, phosphorous, and potassium) for the plant to grow without soil.
4 thoughts on “DIY Hydroponics in Mason Jar with Kratky Method”
Comments are closed.