Hello and welcome to How Hydroponics. Since I covered the best pH and EC meters for hydroponics in 2021, a lot has been changed. The market is full of new products and growers are also now more aware of the usage of EC meters and monitoring the pH levels of their hydroponics systems.
EC meters are a very important piece of hydroponic equipment that many people don’t use. Especially if you are a beginner, you may not have even heard of using an EC meter in hydroponics. But let me tell you that it can make or break your whole hydroponic system.
Basically, an Electrical Conductivity meter or EC meter is an electrical device that measures the number of free-floating ions (N+ or OH–) or the number of salts in the nutrient solution, represented as the concentration of a nutrient solution. The EC meter gives the measurement in millisiemens per centimetre (mS/cm), which can be converted into PPM.
I am going to tell you the best EC meters available for hydroponics in the market. Along with that, I am also going to cover all the essential points that you must know before buying or using an EC meter.
Please note that in this blog, I am only discussing pen-type pH and EC meters for hydroponics. If you are looking for automated controllers, please check this article instead.
Table of Contents
This article is the ultimate guide to buying an EC meter for hydroponics.
Without further delay, let’s dig right in to my list of best pH meters for hydroponics that growers can take advantage of and maximise their yields in 2025.
Legal Disclaimer : As an Amazon Associate HowHydroponics.com earns from qualifying purchases. HowHydroponics.com also participates in affiliate programs with other sites. HowHydroponics.com is compensated for referring traffic and business to these companies.
Budget-Friendly EC & pH Meter for Hydroponics
1. VIVOSUN Digital pH and TDS Meter Kit
The most affordable and handy pH meter you can ever get. This has been my favourite since 2022. May not be the most accurate but if you are someone who is just starting and doesn’t want to spend a fortune on EC meter, then this one is for you.
Suitable For – Beginners
| Pros | Cons | Vivosun Digital kit |
|---|---|---|
| 1 pH stick and 1 TDS & EC stick 3 calibration buffer pH range of 0-14 EC range of 0-9990 ppm (also in µs/cm) Temperature range of 0.1- 80.0°C (also in Fahrenheit) Compact and portable | Frequent calibration needed Inconsistent pH readings Weak waterproofing Calibration resets after battery changes | 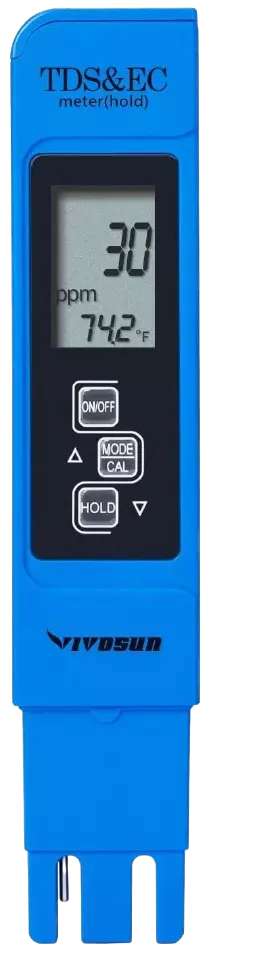 |
2. HoneForest 3 in 1 TDS, EC, and pH Meter
This 3 in 1 tester can help you start your hydroponic journey without any hassle. This low cost EC meter comes with titanium alloy probe that enhances its accuracy and durability. Although I am not sure how much reliable a reading this can give but not bad for a start. Lets look at some of the features.
Suitable For – Beginners
| Pros | Cons | HoneForest 3-in-1 |
|---|---|---|
| 3 in 1 pH, EC, and temperature meter Backlit LCD makes it easier to take readings Autolock feature for stabilised readings They also advertise 3 3-year warranty, but I am doubtful about that one | Non-replaceable, soldered-in battery Accuracy and consistency issues No user calibration available | 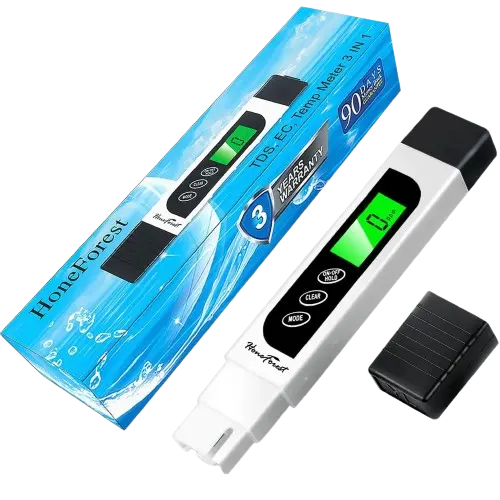 |
Also, Read “The Only pH Down guide you’ll ever need for Hydroponics“
Mid-Range Pen Type pH & EC meter
1. Bluelab PENCON Conductivity Pen and Digital TDS Meter
One of the most loved brands in hydroponics. Bluelab EC and pH meters are a great value for money and accurate. This can help you accurately measure the EC and TDS of your nutrient solution for hydroponics or greenhouse plants, your drinking water or you can even use it for industrial use.
Suitable For – Beginners and Seasoned
| Pros | Cons | Bluelab Pencon |
|---|---|---|
| EC & TDS in multiple units (EC, CF, PPM 500 & PPM 700) Factory‑calibrated with optional recalibration Fully waterproof pen Single-button operation, auto‑hold for easy reading 1‑year limited warranty and available calibration/cleaning kits | Despite being advertised as waterproof, users have reported water intrusion Non-replaceable probe & fragility Calibration and accuracy issues | 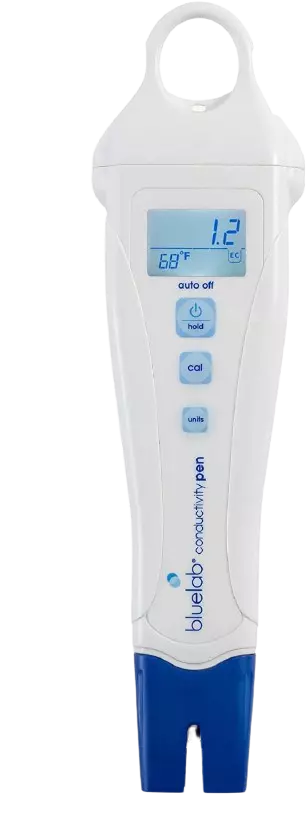 |
2. Aero-Gro Digital Pen Type Tester for Hydroponics
I use the AERO-GRO 5-in-1 Digital Water Tester to easily check pH, TDS, EC, salinity, and temperature in my hydroponic system. It’s accurate, waterproof, and comes with everything I need for calibration. The backlit display makes it simple to read, and it’s built tough for everyday use.
Suitable for – Beginners and Amateur growers
| Pros | Cons | Aero-Gro Digital Pen |
|---|---|---|
| Measures pH, TDS, EC, and Salinity (both % and ppm) pH range 0–14 with 0.01 precision, 3-point calibration Built to IP67 standard Large, backlit, high-contrast LCD Comes with buffer/calibration powders and hard storage case | No automatic calibration No data logging or connectivity Runs on replaceable batteries | 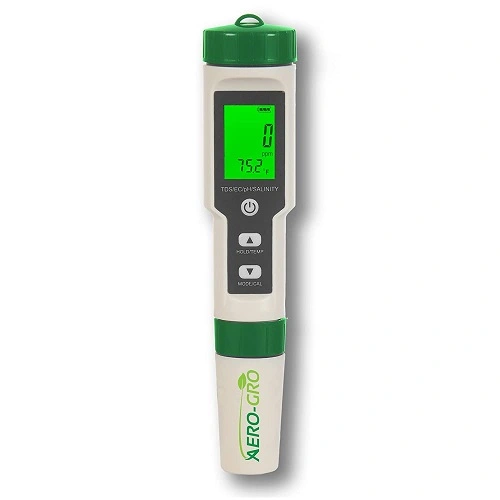 |
Also, Read “21 Best Hydroponic Gardening Gifts ever“
3. Apera Instruments AI311 Premium Series
The Apera Instruments PH60 pH tester is helpful for accurate, hassle-free pH monitoring. It’s waterproof, highly precise (±0.01 pH), and has a replaceable probe for long-term use. The backlit display makes readings easy to see, and it’s perfect for my hydroponic setup, with fast calibration and a rugged design.
Suitable for – Beginners and Amatuer Home Growers
| Pros | Cons | Apera AI311 |
|---|---|---|
| Highly accurate & stable Rugged, waterproof & floatable Replaceable probe design | Manual Calibration complexity Glass Probe fragility | 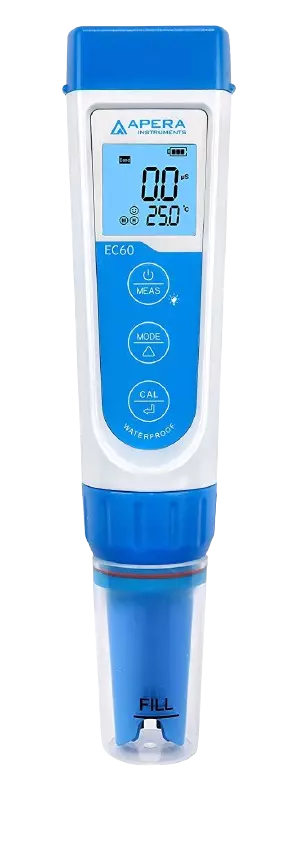 |
Premium High Precision Pen Type pH & EC Meter
1. Bluelab PENSTP pH and Conductivity Starter Pack
The Bluelab pH & Conductivity Starter Pack keeps my hydro setup in check. It includes waterproof, floating pens for pH (±0.1) and conductivity (EC, CF, ppm) with temperature readouts. Comes with calibration care kit, automatic temp compensation, backlit display, and rugged build for daily use
Suitable for – Slightly advanced and experienced growers who need high precision
| Pros | Cons | Bluelab PENSTP |
|---|---|---|
| Includes pH & conductivity pens, calibration solutions, cleaner, and care tools Ideal for wet hydro setups Bright backlit display, auto‑temp compensation, and two-point pH calibration | pH probe non-replaceable Premium price | 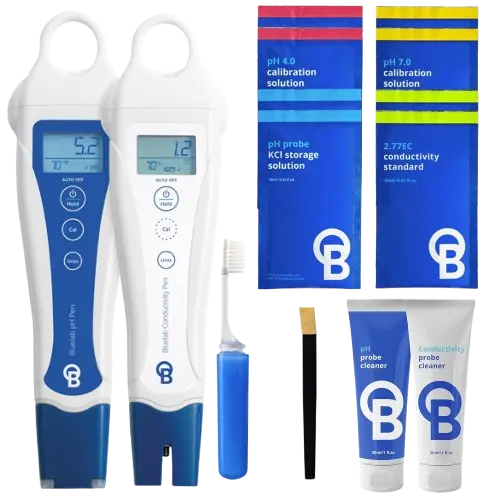 |
2. APERA INSTRUMENTS AI316 Premium Series
Apera Instruments PC60 Premium Pocket Tester measures pH, EC, TDS, salinity, and temperature with precision. It features a replaceable multi‑parameter probe, dual‑backlit display, IP67 waterproof housing, and auto‑calibration/self‑diagnosis. The kit includes calibration solutions and storage accessories, ideal for hydro setups and field use.
Suitable for – Advanced hydroponics & aquaponics growers
| Pros | Cons | Apera AI316 Premium |
|---|---|---|
| Measures five key parameters in one device Replaceable multi‑probe Floats in water, IP67‑rated housing Smart UI features | Maintenance involves multi‑point calibration While swap‑able, the multi‑probe cost is on a higher side | 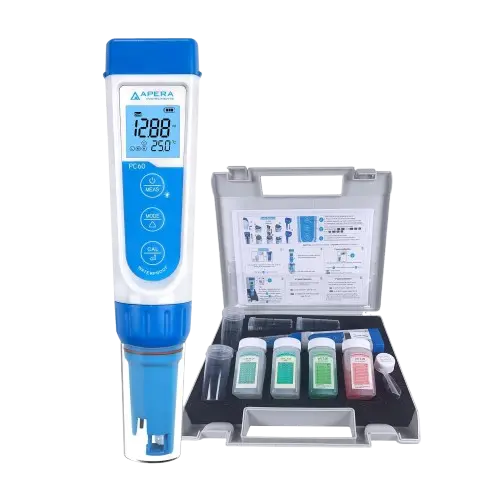 |
3. AC Infinity Hydroponic Meter PRO Kit
I use the AC Infinity Hydroponic Meter PRO Kit to precisely monitor pH, EC, TDS, temperature, and salinity in my hydro setup. It offers lab-grade ±0.01 pH accuracy, an interchangeable glass probe, and rugged IP67 waterproof build. It includes calibration and storage solutions for long-term reliability.
Suitable for – Advanced growers with large hydroponic setups
| Pros | Cons | AC Infinity PRO Kit |
|---|---|---|
| Measures five critical parameters with quick, ±0.01‑accurate readings Extend the device lifespan by swapping worn glass sensors IP67‑rated housing resists water, dust, and even heat Comes with buffer and calibration solutions | Some users cite that the protective cap doesn’t seal tightly Consistent calibration is required for accurate results | 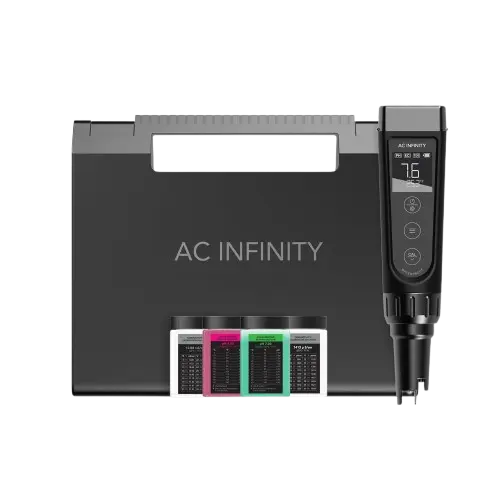 |
EC Meter Buying Guide
Why use an EC meter in hydroponics?
If you are new to hydroponics, you must be wondering why do you even need to use an EC meter? Well, in the beginning when I started I was of the same opinion. So, let me tell you exactly why you need an EC meter in hydroponics.
By now you know that an EC meter measures the concentration of the nutrient elements in the hydroponic solution. So, this plays a very important role in maintaining your hydroponic system.
When we start a system, the hydroponic solution we use is the recommended range of pH level and PPM. This is because we follow the steps given by the manufacturer to make a gallon or 5 gallons of nutrient solution.
But as the plant grows it utilizes some nutrients more than others, the hydroponic nutrient solution starts to get absorbed and also temperature comes into effect. This modifies the concentration level of the hydroponic solution and if not corrected the plant may lead to either wilting or bolting and eventually die.
Also, if the water you are using to make the hydroponic nutrient solution has more than 75 ppm concentration of bicarbonates this will make the solution more alkaline which will result in a higher pH level of the nutrient solution. For this reason, you have to use an EC meter to check the PPM levels of your water and the solution.
To reduce the pH level of your hydroponic nutrient solution you can use acidic fertilizers like phosphoric acid, citric acid, or vinegar.
In conclusion, it is very important to keep checking the EC of the hydroponic solution in regular intervals and correct the concentration whenever it skews. This process is also called nutrient management and an EC meter is key equipment used in the process.
I am sure, now you know why an EC meter is important in hydroponics.
How to use an EC meter in hydroponics?
An EC meter is used for nutrient solution management in hydroponics. It has a similar kind of application in aquaponics and freshwater systems also. So, how do you use that equipment?
Now, you know how to calibrate the EC meter. So, once you have calibrated it you can go on with the following steps. I am considering that you are building a new hydroponic system so that this will be more meaningful for my audience who are new to hydroponics.
Note- I am assuming that you have already calibrated your EC meter. If not, read the next section first.
Step 1 – Fill the reservoir or tank or a tub with either filtered water or tap water. Be sure to check the pH and EC of the water before using it in the hydroponic system.
Step 2 – Now add the hydroponic fertilizer to the water. Use the instructions given by the nutrient manufacturer for the quantity to be added.
Step 3 – Stir the solution until it mixes well. After that put the measuring head of the EC meter into the solution. The readings may fluctuate initially. Wait for it to become stable.
Step 4 – If the reading is higher than the optimum level required for the hydroponic plant you are growing, then you have to dilute the solution by adding more water and repeat Step 3.
I have given an EC Reading chart for the optimum level of EC and pH values according to the vegetables below in this article. It is also available to download. Do check it out.
Step 5 – If the reading is lower than the optimum level then add more nutrient fertilizer to the solution and repeat step 3.
Step 6 – Rinse the probe and store it in the cleaning fluid.
How to calibrate an EC meter?
Now once you have bought an EC meter, you should know how to use it and the first step in measuring the EC of any kind of solution is to first calibrate your EC meter.
EC meter calibration is an important step in determining the EC of any solution and it cannot be skipped because you need to have a reference point so that you know your EC meter is working just fine.
To calibrate the EC meter you need something called a Buffer solution. A buffer solution is an ideal solution whose EC is known to you already. You can buy any standard conductivity buffer solution on Amazon easily. The buffer solution generally has an EC value of 1.41 mS/cm.
So, before using the EC meter on the nutrient solution you need to measure the EC of the buffer solution. If the EC meter shows the correct reading as prescribed on the buffer solution bottle, then you are good to go. Otherwise, you will have to check for more solutions.
In general, 2-point conductivity buffer solutions are used for calibration which gives better accuracy. 2-point meaning using two buffer solutions for calibration instead of just one.
I hope, now you know how to calibrate an EC meter for your hydroponic system.
Also Read “Ideal Temperature and Humidity for Grow Tent“
EC to PPM/TDS Conversion
In case you are wondering how to convert EC units into PPM units then let me walk you through it. The Electric Conductivity meter measures in mS/cm or dS/m but manufacturers use PPM to demonstrate the concentration of a nutrient solution. Also, different countries use different PPM scales, in the USA they use a 500 scale or a 650 scale and in the UK a 700 scale is used.
So this is how you convert EC to PPM
In USA
PPM500 = EC x 500 or,
PPM650 = EC x 650
In UK
PPM700 = EC x 700
1 mS = 10 CF = 700ppm
EC, pH, and PPM Reading chart for Hydroponics
This is the most demanded resource in the hydroponic community. I have searched for over 50 documents to get this data. The table below gives the pH, EC, and PPM requirements for 80 vegetables, fruits, and herbs that people grow hydroponically. I hope this will help you guys in your hydroponics journey.
Get this reading chart in your inbox.
| Crops | EC (mS/cm) | pH | PPM 500 (USA) | PPM 700 (UK) |
| African Violet | 1.2 to 1.5 | 6.0 to 7.0 | 600 to 750 | 840 to 1050 |
| Ambra Radicchio | 5.5 to 6.5 | |||
| Artichoke | 0.8 to 1.8 | 6.5 to 7.5 | 400 to 900 | 560 to 1260 |
| Asparagus | 1.4 to 1.8 | 6.0 to 6.8 | 700 to 900 | 980 to 1260 |
| Banana | 1.8 to 2.2 | 5.5 to 6.5 | 900 to 1100 | 1260 to 1540 |
| Basil | 1.0 to 1.6 | 5.5 to 6.0 | 500 to 800 | 700 to 1120 |
| Bean (Common) | 2.0 to 4.0 | 6 | 1000 to 2000 | 1400 to 2800 |
| Bean (Italian Bush) | 6.0 to 6.5 | |||
| Bean (Lima) | 6.0 to 6.5 | |||
| Bean (Pole) | 6.0 to 6.5 | |||
| Beetroot | 0.8 to 5.0 | 6.0 to 6.5 | 400 to 2500 | 560 to 3500 |
| Bell Peppers | 2.0 to 2.5 | 6.0 to 6.5 | 1000 to 1250 | 1400 to 1750 |
| Black Currant | 1.4 to 1.8 | 6 | 700 to 900 | 980 to 1260 |
| Blueberry | 1.8 to 2.0 | 4.0 to 5.0 | 900 to 1000 | 1260 to 1400 |
| Broadbean | 1.8 to 2.2 | 6.0 to 6.5 | 900 to 1100 | 1260 to 1540 |
| Broccoli | 2.8 to 3.5 | 6.0 to 6.8 | 1400 to 1750 | 1960 to 2450 |
| Brussel Sprouts | 2.5 to 3.0 | 6.5 to 7.5 | 1250 to 1500 | 1750 to 2100 |
| Cabbage | 2.5 to 3.0 | 6.5 to 7.0 | 1250 to 1500 | 1750 to 2100 |
| Capsicum | 1.8 to 2.2 | 6.0 to 6.5 | 900 to 1100 | 1260 to 1540 |
| Carnation | 2.0 to 3.5 | 6 | 1000 to 1750 | 1400 to 2450 |
| Carrots | 1.6 to 2.0 | 6.3 | 800 to 1000 | 1120 to 1400 |
| Cauliflower | 0.5 to 2.0 | 6.0 to 7.0 | 250 to 1000 | 350 to 1400 |
| Celery | 1.8 to 2.4 | 6.5 | 900 to 1200 | 1260 to 1680 |
| Chicory | 1.0 to 1.6 | 5.5 to 6.0 | 500 to 800 | 700 to 1120 |
| Chives | 1.8 to 2.4 | 6.0 to 6.5 | 900 to 1200 | 1260 to 1680 |
| Collard Greens | 6.5 to 7.5 | |||
| Courgettes | 1.8 to 2.4 | 6 | 900 to 1200 | 1260 to 1680 |
| Cucumber | 1.7 to 2.0 | 5.0 to 5.5 | 850 to 1000 | 1190 to 1400 |
| Eggplant | 2.5 to 3.5 | 6 | 1250 to 1750 | 1750 to 2450 |
| Endive | 2.5 to 3.5 | 5.5 to 6.5 | 1250 to 1750 | 1750 to 2450 |
| Fennel | 1.0 to 1.4 | 6.4 to 6.8 | 500 to 700 | 700 to 980 |
| Ficus | 1.6 to 2.4 | 5.5 to 6.0 | 800 to 1200 | 1120 to 1680 |
| Fodder | 2.0 to 2.4 | 5.5 | 1000 to 1200 | 1400 to 1680 |
| Garlic | 1.4 to 1.8 | 6 | 700 to 900 | 980 to 1260 |
| Hot Peppers | 3.0 to 3.5 | 6.0 to 6.5 | 1500 to 1750 | 2100 to 2450 |
| Lavender | 1.0 to 1.4 | 6.4 to 6.8 | 500 to 700 | 700 to 980 |
| Leek | 1.4 to 1.8 | 6.5 to 7.0 | 700 to 900 | 980 to 1260 |
| Leek | 1.4 to 1.8 | 6.5 to 7.0 | 700 to 900 | 980 to 1260 |
| Lemon Balm | 1.0 to 1.6 | 5.5 to 6.5 | 500 to 800 | 700 to 1120 |
| Lettuce | 1.2 to 1.8 | 6.0 to 7.0 | 600 to 900 | 840 to 1260 |
| Marjoram | 1.6 to 2.0 | 6 | 800 to 1000 | 1120 to 1400 |
| Marrow | 1.8 to 2.4 | 6 | 900 to 1200 | 1260 to 1680 |
| Melon | 2.0 to 2.5 | 5.5 to 6.0 | 1000 to 1250 | 1400 to 1750 |
| Mint | 2.0 to 2.4 | 5.5 to 6.0 | 1000 to 1200 | 1400 to 1680 |
| Mustard Cress | 1.2 to 2.4 | 6.0 to 6.5 | 600 to 1200 | 840 to 1680 |
| Okra | 1.0 to 2.4 | 6.5 | 500 to 1200 | 700 to 1680 |
| Onions | 1.4 to 1.8 | 6.0 to 6.7 | 700 to 900 | 980 to 1260 |
| Pak Choi | 1.5 to 2.0 | 7 | 750 to 1000 | 1050 to 1400 |
| Parsley | 1.8 to 2.2 | 6.0 to 6.5 | 900 to 1100 | 1260 to 1540 |
| Parsnip | 1.4 to 1.8 | 6 | 700 to 900 | 980 to 1260 |
| Passionfruit | 1.6 to 2.4 | 6.5 | 800 to 1200 | 1120 to 1680 |
| Paw-Paw | 1.6 to 2.4 | 6.5 | 800 to 1200 | 1120 to 1680 |
| Pea | 0.8 to 1.8 | 6.0 to 7.0 | 400 to 900 | 560 to 1260 |
| Peas (Sugar) | 6.0 to 6.8 | |||
| Pepino | 2.0 to 5.0 | 6.0 to 6.5 | 1000 to 2500 | 1400 to 3500 |
| Peppers | 0.8 to 1.8 | 5.5 to 6.0 | 400 to 900 | 560 to 1260 |
| Pineapple | 2.0 to 2.4 | 5.5 to 6.0 | 1000 to 1200 | 1400 to 1680 |
| Potato | 2.0 to 2.5 | 5.0 to 6.0 | 1000 to 1250 | 1400 to 1750 |
| Pumpkin | 1.8 to 2.4 | 5.5 to 7.5 | 900 to 1200 | 1260 to 1680 |
| Radish | 1.6 to 2.2 | 6.0 to 7.0 | 800 to 1100 | 1120 to 1540 |
| Red Currant | 1.4 to 1.8 | 6 | 700 to 900 | 980 to 1260 |
| Rhubarb | 1.6 to 2.0 | 5.5 to 6.0 | 800 to 1000 | 1120 to 1400 |
| Rose | 1.5 to 2.5 | 5.5 to 6.0 | 750 to 1250 | 1050 to 1750 |
| Rosemary | 1.0 to 1.6 | 5.5 to 6.0 | 500 to 800 | 700 to 1120 |
| Sage | 1.0 to 1.6 | 5.5 to 6.5 | 500 to 800 | 700 to 1120 |
| Silverbeet | 1.8 to 2.3 | 6.0 to 7.0 | 900 to 1150 | 1260 to 1610 |
| Spinach | 1.8 to 2.3 | 6.0 to 7.0 | 900 to 1150 | 1260 to 1610 |
| Squash (Summer) | 5.0 to 6.5 | |||
| Squash (Winter) | 5.0 to 6.5 | |||
| Strawberry | 1.8 to 2.2 | 6 | 900 to 1100 | 1260 to 1540 |
| Sweet Corn | 1.6 to 2.4 | 6 | 800 to 1200 | 1120 to 1680 |
| Sweet Potato | 2.0 to 2.5 | 5.5 to 6.0 | 1000 to 1250 | 1400 to 1750 |
| Swiss Chard | 6.0 to 6.5 | |||
| Taro | 2.5 to 3.0 | 5.0 to 5.5 | 1250 to 1500 | 1750 to 2100 |
| Thyme | 0.8 to 1.6 | 5.5 to 7.0 | 400 to 800 | 560 to 1120 |
| Tomato | 2.0 to 4.0 | 6.0 to 6.5 | 1000 to 2000 | 1400 to 2800 |
| Turnip | 1.8 to 2.4 | 6.0 to 6.5 | 900 to 1200 | 1260 to 1680 |
| Watercress | 0.4 to 1.8 | 6.5 to 6.8 | 200 to 900 | 280 to 1260 |
| Watermelon | 1.5 to 2.4 | 5.8 | 750 to 1200 | 1050 to 1680 |
| Zucchini | 1.8 to 2.4 | 6 | 900 to 1200 | 1260 to 1680 |
FAQ
Do I need an EC meter for hydroponics?
Yes, an EC meter is needed for hydroponic systems. An EC meter helps to determine the concentration of the hydroponic nutrient solution. It also helps in mitigating the risk of bacteria and fungus as you can easily notice the change in the EC of your solution and work to find the root cause.
How to control EC in hydroponics?
To control the EC of your hydroponic nutrient solution, you should know the optimum range of EC levels for the plant you are growing. I have given a comprehensive EC reading chart in this article. If the EC is lower than the optimum reading then add more fertilizer and if the EC is higher than the optimum level, dilute the solution by adding water.
Is EC the same as PPM?
EC is the short form of Electronic Conductivity and PPM is the short form for Parts Per Million. EC meter gives the concentration of the nutrient elements present in the solution. That quantity can be measure in both EC units and PPM. PPM is a common term as it is used to measure the impurity of drinking water at our homes. That is why people prefer to measure EC of nutrient solution also in PPM. 1 EC = EC X 500 for PPM 500 scale (U.S.A.) and 1 EC = EC X 700 for the PPM 700 Scale (U.K.).
Does pH down raise EC?
Yes, reduction in pH level of your nutrient solution can be a reason to increase EC of the solution. As the pH lowers the solution becomes acidic which means the concentration of acidic elemets is increasing and neutral and alkaline elements are being absrobed at a faster rate by the plant.
What should be the EC for hydroponic tomatoes?
The EC for hydroponic tomatoes should be in the range of 2.0 to 4.0. The PPM should be in the range of 1000 to 2000 for PPM 500 scale and 1400 to 2800 in the PPM 700 scale.
Thanks for reading. Let me know in the comments section if you want me to cover any other topic on hydroponics.
Have a Good Day!